Preface
前文
I’ve been working on a project recently that required glow effects for 2D weapons. After implementing a simple solution, I’d like to share the approach and code in this article.
最近在搞一个项目,需要给2D武器做发光特效,于是简单的搞了一下,并在本文分享一下思路和代码
Prototype
雏形
Let’s start by creating a fragment shader. Note that this shader supports:
- Transparency (Transparent)
- Custom color blending (Blend)
- SRP Batcher batching (CBuffer)
我们先创建一个片元着色器,注意,这个Shader支持:
- 透明(Transparent)
- 自定义颜色混合(Blend)
- SRP Batcher合批(CBuffer)
INFO
SRP Batcher batching can significantly optimize rendering performance and is highly recommended (this shader is compatible - just use it on MeshRenderer or SpriteRenderer in Unity 2023+ to enable the optimization)
INFO
SRP Batcher 合批能够大幅度优化渲染性能,推荐使用(这个Shader是兼容的,只需要在MeshRenderer或Unity2023及之后版本的SpriteRenderer上使用这个Shader即可开启优化)
Shader "Unlit/Fx"
{
    Properties
    {
        [Enum(UnityEngine.Rendering.BlendMode)]_Src("_Src",Int)=5
        [Enum(UnityEngine.Rendering.BlendMode)]_Dst("_Dst",Int)= 10
    }
    SubShader
    {
        Tags
        {
            "RenderType" = "Transparent"
            "Queue" = "Transparent"
            "RenderPipeline" = "UniversalPipeline"
        }

        ZWrite Off
        Blend [_Src][_Dst]

        Pass
        {
            HLSLPROGRAM
            #include "Packages/com.unity.render-pipelines.universal/ShaderLibrary/Core.hlsl"

            CBUFFER_START(UnityPerMaterial)
            CBUFFER_END

            #pragma vertex vert
            #pragma fragment frag

            struct Attributes
            {
                float4 positionOS : POSITION;
                float4 uv : TEXCOORD0;
            };

            struct Varyings
            {
                float4 positionCS : SV_POSITION;
                float2 uv : TEXCOORD0;
            };

            Varyings vert(Attributes IN)
            {

            }

            half4 frag(Varyings IN) : SV_Target
            {

            }
            ENDHLSL
        }
    }
}Rendering 2D Images
渲染2D图片
We want the shader to receive an image and output its content (which can be a small portion of the image, allowing us to pass in a large atlas texture). So we need to define these parameters in the shader:
- Source texture
- Sampling region (the x/y position of pixels to render from the source texture, plus width and height)
Let’s modify the Properties:
我们希望着色器能获取到一张图片,并且我们希望着色器输出图片的内容(可以是图片中的某一小部分内容,这样我们可以把图集的大图传进来),所以我们需要在着色器内定义一下参数:
- 采样图
- 采样范围(需要渲染的像素于采样图的x/y位置,以及宽与高)
我们来修改一下Properties:
Properties
{
  _SrcTexture ("原图", 2D) = "clear" {}
  _Rect ("图片信息", Vector) = (0, 0, 0, 0)
  [Enum(UnityEngine.Rendering.BlendMode)]_Src("_Src",Int)=5
  [Enum(UnityEngine.Rendering.BlendMode)]_Dst("_Dst",Int)= 10
}Now let’s modify the CBuffer:
我们再修改一下CBuffer:
CBUFFER_START(UnityPerMaterial)
  float4 _Rect;
  float4 _SrcTexture_TexelSize;
CBUFFER_ENDDefine the sampling:
定义一下采样:
TEXTURE2D_FLOAT(_SrcTexture);
SAMPLER(sampler_SrcTexture);INFO
We plan to store the image information in _Rect as (x position, y position, width, height) relative to the source texture.
INFO
我们打算在_Rect内,放入需要渲染的图片基于原图的(x位置,y位置,宽,高)
Next, let’s modify the vertex shader:
接着,我们修改定点着色器:
Varyings vert(Attributes IN)
{
  Varyings OUT;

  OUT.positionCS = TransformObjectToHClip(IN.positionOS.xyz);

  float4 cur_pixel = float4(IN.uv.x * _Rect.z, IN.uv.y * _Rect.w, 0, 0);
  float x = (_Rect.x + cur_pixel.x) * _SrcTexture_TexelSize.x;
  float y = (_SrcTexture_TexelSize.w - _Rect.y - _Rect.w + cur_pixel.y) *
  _SrcTexture_TexelSize.y;

  OUT.uv = float2(x, y);
  return OUT;
}In the vertex shader, we calculate the UV coordinates that correspond to the xy position in the source texture for the pixels we want to render, then convert them to UV coordinates (transforming the x and y ranges from [0, width or height] to [0,1]).
Finally, we use the fragment shader to output the pixels we want to render:
我们在定点着色器内计算出需要渲染的uv基于原图所对应的xy位置,再将其转化为uv(把x和y的范围从[0,宽或高] 变为[0,1]
最后,我们用片段着色器来输出需要渲染的像素:
half4 frag(Varyings IN) : SV_Target
{
  half4 ret = SAMPLE_TEXTURE2D(_SrcTexture, sampler_SrcTexture, IN.uv.xy);
  return ret;
}This simply receives the UV coordinates calculated by the vertex shader, samples the corresponding pixels, and outputs them. Let’s see the result:
其实就是接收定点着色器计算的uv,再去采样对应像素,最后输出出来,让我们来看看效果吧
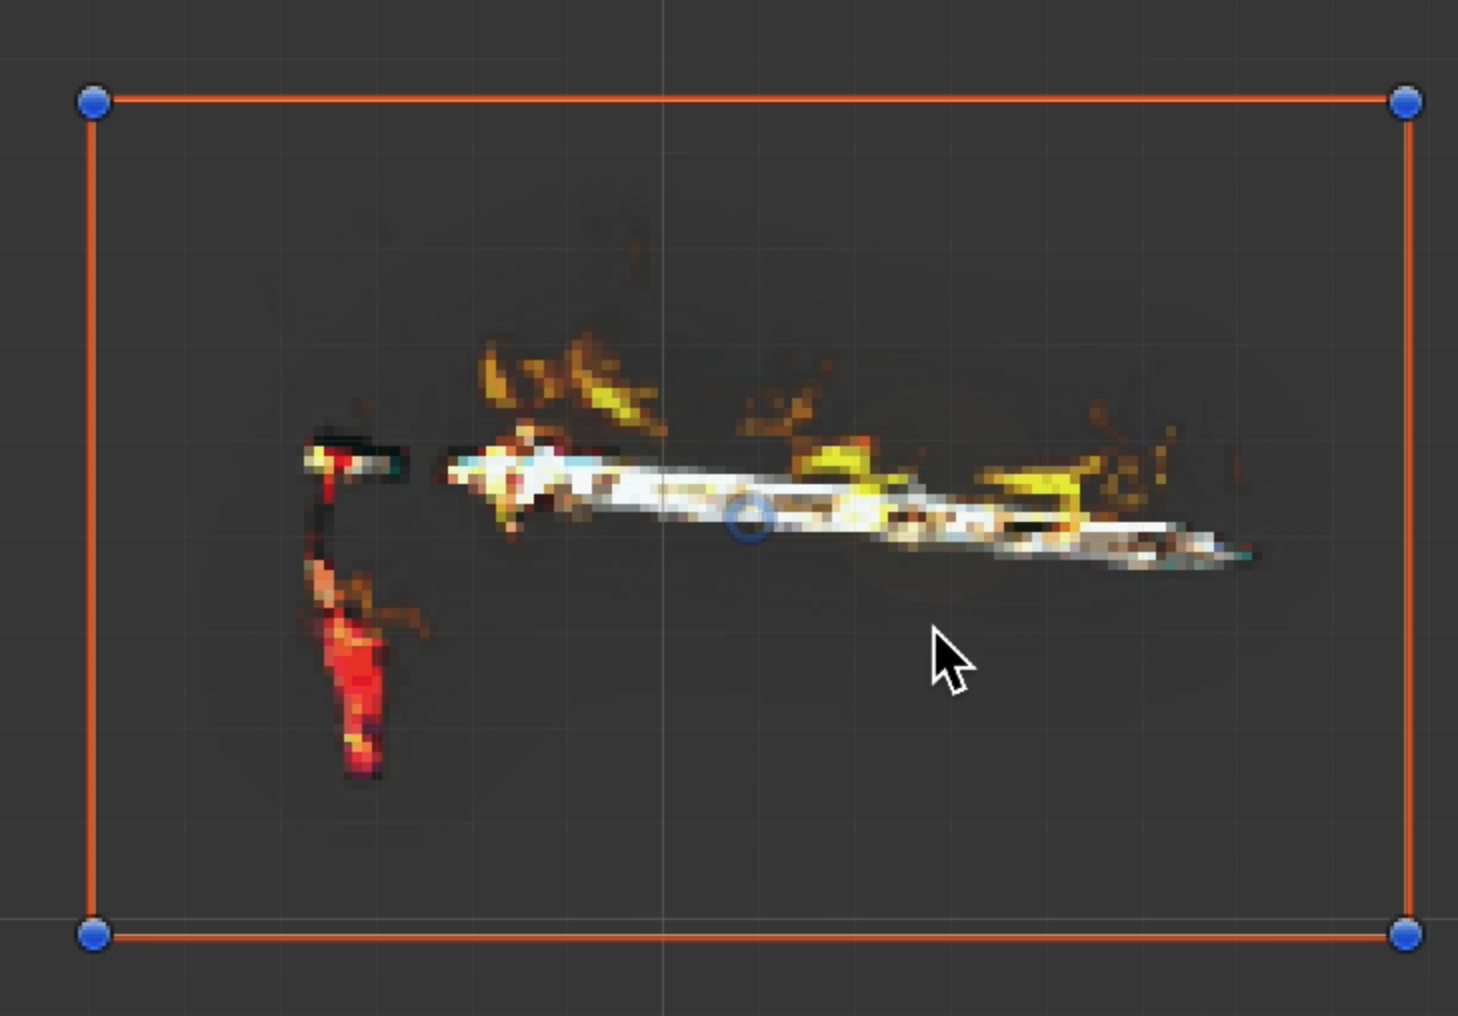
As you can see, the image is rendered correctly.
可以看到,图片被正确的渲染出来了
Glow Effect
高光效果
Now let’s add a glow effect with a breathing light animation.
Essentially, the glow effect overlays a color on top of the original image, with time controlling the blending relationship between the glow color and the original pixels. If the original image has semi-transparent pixels, we can even achieve a halo effect.
Let’s modify the Properties again:
现在,我们添加高光效果,并且给其附加呼吸灯效果
其实本质上高光就是把一个颜色盖在原图上,再由时间去调整高光颜色与原像素的叠加关系,如果原图本身就有半透明像素的话,我们甚至能实现光晕效果
我们再修改一下Properties:
Properties
{
  _SrcTexture ("原图", 2D) = "clear" {}
  _Rect ("图片信息", Vector) = (0, 0, 0, 0)
  [Toggle(GLOW)] _GLOW ("发光", Float) = 0
  _Color ("特效颜色", Vector) = (0, 0, 0, 0)
  _Speed ("特效速度", Float) = 0
  _Range ("特效范围", Float) = 0
  _Alpha ("透明度", Range(0, 1)) = 1
  [Enum(UnityEngine.Rendering.BlendMode)]_Src("_Src",Int)=5
  [Enum(UnityEngine.Rendering.BlendMode)]_Dst("_Dst",Int)= 10
}With these parameters, we can control whether the shader renders the image with glow effects. We can define the glow color, breathing speed, halo range (only applicable when the original image has semi-transparent pixels for halo rendering), and the final output transparency.
Now let’s modify the CBuffer again:
有了这些参数,我们就能控制Shader是否对图片进行渲染并产生高光,同时我们可以定义高光的颜色,高光呼吸的速度,光晕范围(仅限于原图由半透明像素用于渲染光晕的情况下),以及最后输出的图片的透明度
我们再修改一下CBuffer:
CBUFFER_START(UnityPerMaterial)
  float _Speed;
  float _Range;
  float _Alpha;
  float4 _Rect;
  float4 _SrcTexture_TexelSize;
  float4 _Color;
CBUFFER_ENDNow let’s start modifying the fragment shader.
First, let’s calculate the coefficient for rendering the glow color:
现在我们开始修改片段着色器
我们先计算渲染高光颜色的系数:
half v = (cos(_Time.y * _Speed) + 1);
v = step(_Range, ret.a);
half4 c = _Color;
c.rgb *= v;We first extract Unity’s Time.y, which represents runtime, then multiply it by _Speed to make the cos function oscillate more frequently, allowing us to render the glow more frequently. Next, we add 1 to get a value in the [0,1] range to control the rgb channels of the glow color _Color.
我们首先将Unity提供的Time.y取出,代表运行时间,然后我们乘以_Speed来使得cos函数的频率更频繁,这样我们可以更频繁的去渲染高光,接下来我们对其+1,这样我们可以得到一个在[0,1]范围内的数字,用于控制高光颜色_Color的rgb通道
INFO
We use step to ensure that the glow is only applied to the original pixels when the current pixel’s transparency exceeds _Range, which allows us to achieve the halo effect.
INFO
我们利用step来确保仅在当前渲染的像素透明度超过_Range时才去把高光叠加到原像素上,这样就可以实现光晕效果了
Next, let’s modify the original pixels to blend them with the glow pixels:
接着我们来修改原像素,使其与高光像素叠加:
ret.rgb = lerp(c, ret, 1 - v * c.a);Here we use the lerp function for blending. The original pixel color is multiplied by 1 - v * c.a for rendering, while the glow pixel color is multiplied by v * c.a for rendering, where c.a is the transparency we set for the glow color. This achieves the breathing light effect.
在这里我们用了lerp函数来进行叠加,原像素的颜色会乘以1 - v * c.a进行渲染,高光像素的颜色会乘以v * c.a进行渲染,其中c.a是我们对高光颜色设置的透明度,这样的话可以实现呼吸灯效果
Let’s see the result:
我们来看看效果:

Now let’s see what happens when we adjust parameters in Unity:
我们再来看看在Unity内调整参数会发生什么:
As you can see, the effect is perfect!
可以看到,效果非常完美
WARNING
In the video, GLOW isn’t checked in the editor because we haven’t written conditional compilation yet!
WARNING
视频里在编辑器下没有对GLOW进行打钩,这是因为我们现在还没写条件编译!
Conditional Compilation
条件编译
Sometimes we don’t want the glow effect and only want to render the image. In such cases, we can use conditional compilation:
We just need to add this before CBuffer:
我们有时不希望高光,只希望渲染图片,这种情况我们可以使用条件编译:
我们只需在CBufffer前加入:
#pragma multi_compile _ GLOWThat’s it!
Next, let’s modify the fragment shader:
即可
接下来我们修改一下片段着色器:
#ifdef GLOW
//高光
half v = (cos(_Time.y * _Speed) + 1) * 0.5;
v = saturate(v) * step(_Range, ret.a);
half4 c = _Color;
c.rgb *= v;
ret.rgb = lerp(c, ret, 1 - v * c.a);
#endifThis way, the glow effect will only be rendered when GLOW is enabled (you can use material.SetKeyword in C# scripts).
这样即可在开启GLOW的情况下渲染高光特效(C#脚本里使用material.SetKeyword即可)
Semi-transparent Rendering
半透明渲染
For some reason, we might want to apply additional transparency to the rendered output. We can simply process the pixels before the fragment shader returns them:
出于某种原因,我们可能希望渲染出来的东西再进行个半透明处理,我们只需要在片段着色器返回像素前对像素做个处理即可:
...
ret.a *= _Alpha;
return ret;Complete Code
完整代码
Shader "Unlit/Fx"
{
    Properties
    {
        _SrcTexture ("原图", 2D) = "clear" {}
        _Rect ("图片信息", Vector) = (0, 0, 0, 0)
        [Toggle(GLOW)] _GLOW ("发光", Float) = 0
        _Color ("特效颜色", Vector) = (0, 0, 0, 0)
        _Speed ("特效速度", Float) = 0
        _Range ("特效范围", Float) = 0
        _Alpha ("透明度", Range(0, 1)) = 1
        [Enum(UnityEngine.Rendering.BlendMode)]_Src("_Src",Int)=5
        [Enum(UnityEngine.Rendering.BlendMode)]_Dst("_Dst",Int)= 10
    }
    SubShader
    {
        Tags
        {
            "RenderType" = "Transparent"
            "Queue" = "Transparent"
            "RenderPipeline" = "UniversalPipeline"
        }

        ZWrite Off
        Blend [_Src][_Dst]

        Pass
        {
            HLSLPROGRAM
            #include "Packages/com.unity.render-pipelines.universal/ShaderLibrary/Core.hlsl"

            #pragma multi_compile _ GLOW

            CBUFFER_START(UnityPerMaterial)
                float _Speed;
                float _Range;
                float _Alpha;
                float4 _Rect;
                float4 _SrcTexture_TexelSize;
                float4 _Color;
            CBUFFER_END

            TEXTURE2D_FLOAT(_SrcTexture);
            SAMPLER(sampler_SrcTexture);

            #pragma vertex vert
            #pragma fragment frag

            struct Attributes
            {
                float4 positionOS : POSITION;
                float4 uv : TEXCOORD0;
            };

            struct Varyings
            {
                float4 positionCS : SV_POSITION;
                float2 uv : TEXCOORD0;
            };

            Varyings vert(Attributes IN)
            {
                Varyings OUT;

                OUT.positionCS = TransformObjectToHClip(IN.positionOS.xyz);

                float4 cur_pixel = float4(IN.uv.x * _Rect.z, IN.uv.y * _Rect.w, 0, 0);
                float x = (_Rect.x + cur_pixel.x) * _SrcTexture_TexelSize.x;
                float y = (_SrcTexture_TexelSize.w - _Rect.y - _Rect.w + cur_pixel.y) *
                    _SrcTexture_TexelSize.y;

                OUT.uv = float2(x, y);
                return OUT;
            }

            half4 frag(Varyings IN) : SV_Target
            {
                half4 ret = SAMPLE_TEXTURE2D(_SrcTexture, sampler_SrcTexture, IN.uv.xy);

                #ifdef GLOW
                //高光
                half v = (cos(_Time.y * _Speed) + 1) * 0.5;
                v = saturate(v) * step(_Range, ret.a);
                half4 c = _Color;
                c.rgb *= v;
                ret.rgb = lerp(c, ret, 1 - v * c.a);
                #endif

                ret.a *= _Alpha;
                return ret;
            }
            ENDHLSL
        }
    }
}Conclusion
结尾
This shader is relatively simple but performance-friendly (with low CPU/GPU pressure after batching since it can use SRP Batcher). Feel free to give it a try if you’re interested!
The halo effect implementation depends heavily on the image itself. If the image doesn’t contain a ring of semi-transparent pixels, there won’t be a halo effect—it will only overlay a glow on the non-transparent pixels of the image.
这个Shader比较简单,但是对性能友好(并且合批后CPU/GPU压力都小,因为可以使用SRP Batcher),感兴趣的朋友可以试试
光晕的实现比较依赖图片本身,如果图片本身不包含一圈半透明像素的话,光晕效果是不会有的,只会在图片非透明像素上盖一层高光